Candlestick Pattern Detector TradingView Script: 9 Tricks

What an Auto Candlestick Pattern Detector Does (and Doesn’t)
A candlestick detector does three helpful jobs:
- Finds patterns consistently – It follows the same rules every time, so you don’t “see what you want to see.”
- Marks the chart – Labels or shapes show where the pattern happened.
- Triggers alerts – You can get notified when a pattern forms (TradingView supports alert triggers through script alert conditions).
But it doesn’t magically guarantee profits. Candlestick patterns are clues—not promises. A bullish pattern in a strong downtrend can fail. A doji in the middle of nowhere can mean… nothing. That’s why adding context (trend, key levels, volatility) matters.
Why “automatic” still needs human confirmation
Think of the script like a smoke detector. It can warn you quickly, but you still check what’s happening before you act. The best traders combine candle signals with:
- trend direction,
- support/resistance,
- and simple risk rules.
Best markets and timeframes for candle signals
Candle patterns tend to behave more cleanly when:
- the market is liquid (major forex pairs, large-cap stocks, popular crypto),
- the timeframe isn’t too tiny (15m, 1H, 4H, 1D are common choices).
How Candlestick Patterns Work in Plain English
Candles are built from four prices:
- Open (where the candle started)
- High (highest point)
- Low (lowest point)
- Close (where it ended)
Body vs wick: what they’re really saying
- Big body = strong push by buyers or sellers
- Long wick = rejection (price tried and failed)
- Small body = indecision or a tug-of-war
Quick glossary of candle terms
- Bullish candle: close > open
- Bearish candle: close < open
- Upper wick: high to top of body
- Lower wick: bottom of body to low
These simple ideas power most pattern rules.
Key Patterns This FREE Script Detects
This script focuses on patterns many traders actually use:
- Engulfing (bullish/bearish): “new candle overwhelms the previous candle’s body”
- Hammer / Hanging Man: long lower wick + small body (context matters)
- Shooting Star / Inverted Hammer: long upper wick + small body
- Doji: tiny body (indecision)
You’ll also see optional logic for Morning Star / Evening Star (3-candle reversals). If you prefer to keep things simple, you can leave them off.
Signals vs Context: The “Trend Filter” Rule
Here’s a common beginner trap: taking every pattern everywhere.

A smarter approach is to filter signals by trend. One easy method is a fast EMA vs slow EMA filter:
- Uptrend: fast EMA above slow EMA → prioritize bullish patterns
- Downtrend: fast EMA below slow EMA → prioritize bearish patterns
This won’t be perfect, but it helps cut “random middle-of-range” signals.
The FREE TradingView Pine Script (Copy/Paste Ready)
Paste this into TradingView → Pine Editor → Save → Add to chart.
//@version=5
indicator("Auto Candlestick Patterns Detector (FREE)", overlay=true, max_labels_count=500)//========================
// Inputs
//========================
groupPatterns = "Patterns"
showEngulfing   = input.bool(true,  "Engulfing", group=groupPatterns)
showHammer      = input.bool(true,  "Hammer / Hanging Man", group=groupPatterns)
showStar        = input.bool(true,  "Shooting Star / Inverted Hammer", group=groupPatterns)
showDoji        = input.bool(true,  "Doji", group=groupPatterns)
showMorningEven = input.bool(false, "Morning/Evening Star (3-candle)", group=groupPatterns)groupFilters = "Filters"
useTrendFilter = input.bool(true, "Use EMA trend filter", group=groupFilters)
emaFastLen     = input.int(20, "EMA Fast", minval=1, group=groupFilters)
emaSlowLen     = input.int(50, "EMA Slow", minval=1, group=groupFilters)useATRFilter = input.bool(false, "Use ATR size filter (reduces noise)", group=groupFilters)
atrLen       = input.int(14, "ATR Length", minval=1, group=groupFilters)
minBodyATR   = input.float(0.10, "Min body size (ATR x)", step=0.01, group=groupFilters)useVolFilter = input.bool(false, "Use volume confirmation (vol > vol[1])", group=groupFilters)groupStyle = "Style"
showLabels = input.bool(true, "Show labels", group=groupStyle)
labelSize  = input.string("small", "Label size", options=["tiny","small","normal","large","huge"], group=groupStyle)//========================
// Helpers (candle anatomy)
//========================
isBull = close > open
isBear = close < openbody     = math.abs(close - open)
range    = high - low
upperW   = high - math.max(open, close)
lowerW   = math.min(open, close) - low// Avoid division by zero
safeRange = range == 0.0 ? 0.0000001 : rangebodyPct  = body / safeRange// Trend filter
emaFast = ta.ema(close, emaFastLen)
emaSlow = ta.ema(close, emaSlowLen)
inUpTrend   = emaFast > emaSlow
inDownTrend = emaFast < emaSlow// Optional filters
atr = ta.atr(atrLen)
atrOk = not useATRFilter or (body >= atr * minBodyATR)
volOk = not useVolFilter or (volume > volume[1])filtersOk() =>
    atrOk and volOktrendOkBull() =>
    not useTrendFilter or inUpTrendtrendOkBear() =>
    not useTrendFilter or inDownTrend//========================
// Pattern Rules
//========================// 1) Engulfing (body engulfing body)
prevBodyHigh = math.max(open[1], close[1])
prevBodyLow  = math.min(open[1], close[1])
curBodyHigh  = math.max(open, close)
curBodyLow   = math.min(open, close)bullEngulf = showEngulfing and isBull and isBear[1] and (curBodyHigh >= prevBodyHigh) and (curBodyLow <= prevBodyLow) and filtersOk() and trendOkBull()
bearEngulf = showEngulfing and isBear and isBull[1] and (curBodyHigh >= prevBodyHigh) and (curBodyLow <= prevBodyLow) and filtersOk() and trendOkBear()// 2) Hammer / Hanging Man (long lower wick, small body near top)
hammerLike = showHammer and (lowerW >= body * 2.0) and (upperW <= body * 0.7) and (bodyPct <= 0.5) and filtersOk()
hammer     = hammerLike and trendOkBull()   // best after down move, but we use bull trend filter as a simple bias toggle
hangingMan = hammerLike and trendOkBear()   // best after up move, using bear trend filter as a bias toggle// 3) Shooting Star / Inverted Hammer (long upper wick, small body near bottom)
starLike      = showStar and (upperW >= body * 2.0) and (lowerW <= body * 0.7) and (bodyPct <= 0.5) and filtersOk()
shootingStar  = starLike and trendOkBear()
invertedHammer= starLike and trendOkBull()// 4) Doji (very small body)
doji = showDoji and (bodyPct <= 0.10) and filtersOk()// 5) Morning Star / Evening Star (simplified 3-candle logic)
smallBody(i) =>
    math.abs(close[i] - open[i]) / ((high[i] - low[i]) == 0.0 ? 0.0000001 : (high[i] - low[i])) <= 0.30morningStar = showMorningEven and isBear[2] and smallBody(1) and isBull and close > (open[2] + close[2]) / 2 and filtersOk() and trendOkBull()
eveningStar = showMorningEven and isBull[2] and smallBody(1) and isBear and close < (open[2] + close[2]) / 2 and filtersOk() and trendOkBear()//========================
// Plotting (labels)
//========================
makeLabel(_cond, _text, _y, _style) =>
    if _cond and showLabels
        label.new(bar_index, _y, _text, style=_style, textcolor=color.white, size=labelSize)// Bullish labels under candles
makeLabel(bullEngulf,       "Bull Engulf", low,  label.style_label_up)
makeLabel(hammer,           "Hammer",     low,  label.style_label_up)
makeLabel(invertedHammer,   "Inv Hammer", low,  label.style_label_up)
makeLabel(morningStar,      "Morning ★",  low,  label.style_label_up)// Bearish labels above candles
makeLabel(bearEngulf,       "Bear Engulf", high, label.style_label_down)
makeLabel(hangingMan,       "Hanging",     high, label.style_label_down)
makeLabel(shootingStar,     "Shoot Star",  high, label.style_label_down)
makeLabel(eveningStar,      "Evening ★",   high, label.style_label_down)// Neutral label
makeLabel(doji, "Doji", close, label.style_label_left)//========================
// Alerts
//========================
alertcondition(bullEngulf,     "Bullish Engulfing", "Bullish Engulfing detected")
alertcondition(bearEngulf,     "Bearish Engulfing", "Bearish Engulfing detected")
alertcondition(hammer,         "Hammer",            "Hammer detected")
alertcondition(hangingMan,     "Hanging Man",       "Hanging Man detected")
alertcondition(shootingStar,   "Shooting Star",     "Shooting Star detected")
alertcondition(invertedHammer, "Inverted Hammer",   "Inverted Hammer detected")
alertcondition(doji,           "Doji",              "Doji detected")
alertcondition(morningStar,    "Morning Star",      "Morning Star detected")
alertcondition(eveningStar,    "Evening Star",      "Evening Star detected")// Optional: show EMAs if trend filter enabled
plot(useTrendFilter ? emaFast : na, title="EMA Fast", linewidth=1)
plot(useTrendFilter ? emaSlow : na, title="EMA Slow", linewidth=1)
Why this approach works well for beginners
- It’s readable and easy to edit.
- You can toggle patterns on/off.
- You can add basic filters (EMA trend, ATR size, volume confirmation).
- It includes alert conditions (so you can create TradingView alerts from the UI).
How to Install and Use on TradingView
- Open TradingView chart
- Go to Pine Editor
- Paste the script → Save
- Click Add to chart
- Open the indicator settings and choose:
- Which patterns you want
- Whether to use EMA/ATR/volume filters
Create alerts the right way
To receive notifications:
- Click Alert (clock icon)
- In Condition, choose this indicator and the pattern trigger you want
TradingView’s docs explain how alert triggers work for scripts and how users create alerts via the UI.
How to Reduce False Positives
If you feel like you’re getting “too many signals,” do these in order:
- Turn on the EMA trend filter
This usually removes the messiest sideways-market signals. - Enable ATR filter
This forces the candle body to be “big enough” compared to recent volatility. - Enable volume confirmation
For some markets, volume helps confirm that the move had participation (not always perfect, but useful).
Also remember: many public TradingView candle indicators add extra confirmation steps for a reason—candles alone can be noisy.
Risk Management for Candle-Based Entries
Even a perfect detector won’t save a bad plan. Here are simple rules many traders use:
- Stop loss: often beyond the wick that “shouldn’t be broken” if the reversal is real
(e.g., below hammer low, above shooting star high) - Take profit (pick one):
- nearest support/resistance zone
- fixed reward ratio like 1:2
- trailing stop after price moves in your favor
Position sizing mini-checklist
- Am I risking a small, fixed % per trade?
- Is my stop logical (not random)?
- Is the market choppy or trending?
Keep it boring. Boring is good.
Backtesting and Forward Testing Tips
Before trusting any pattern:
- Scroll left and check if signals make sense in context.
- Try 2–3 symbols and 2–3 timeframes.
- Watch how patterns behave during major volatility events.
If you later want automation, you can convert the logic into a strategy script, but it’s smarter to start as an indicator first.
Common Mistakes (and Easy Fixes)
- Mistake: Taking every doji as a reversal
Fix: Use doji as a “warning,” not an entry by itself. - Mistake: Ignoring trend
Fix: Keep the EMA filter on until you truly understand market structure. - Mistake: Using tiny timeframes on illiquid assets
Fix: Move up a timeframe or trade more liquid instruments.
FAQs
1) Is this Auto Candlestick Patterns Detector TradingView Script For FREE safe to use?
Yes—this is a normal TradingView Pine Script indicator. It draws labels and creates alert conditions; it doesn’t place real trades by itself.

Powerful Forex VPS for MT4 & MT5 – Best Price
182 in stock
$44.99 $359.99Price range: $44.99 through $359.99| Validity | Monthly, Quarterly, Semi Annually, Annually |
|---|
2) Does it repaint?
The patterns are calculated on candle close. If you use it on a live candle, the candle can change until it closes—so wait for the bar to finish for clean signals.
3) Why do I see signals that fail?
Candlestick patterns are probability tools, not guarantees. That’s why trend filters, key levels, and risk management matter.
4) Can I add more patterns like Three White Soldiers?
Yes. You can extend the script with more multi-candle logic. TradingView’s community has large pattern libraries you can learn from.
5) How do TradingView alerts work with this script?
The script defines alert triggers via alertcondition(). You still create the actual alert from TradingView’s “Create Alert” window by selecting the trigger.
6) What’s the best filter to turn on first?
Start with the EMA trend filter, then add the ATR filter if you still get too much noise.
Conclusion
A good detector saves time and keeps your chart reading consistent. But the real edge comes from pairing candle patterns with trend, structure, and risk control. If you want a simple starting point you can actually edit, this script is a solid base—and it’s an Auto Candlestick Patterns Detector TradingView Script For FREE you can run today.


Most Popular Forex EA

Apex Quant BTCUSD EA: AI Bitcoin Scalper for MT5
In stock
$0.00 $159.99Price range: $0.00 through $159.99

AVA AIGPT5 XAUUSD EA: AI Gold Scalper for MT4
In stock
$0.00 $679.99Price range: $0.00 through $679.99
Elysium Vortex EURCAD EA: AI EURCAD Scalper for MT5
In stock
$0.00 $199.99Price range: $0.00 through $199.99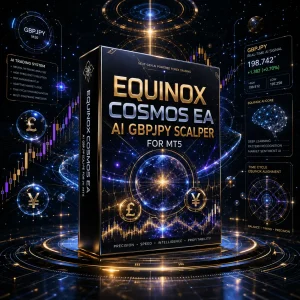
Equinox Cosmos GBPJPY EA: AI GBPJPY Scalper for MT5
In stock
$0.00 $199.99Price range: $0.00 through $199.99


Golden Deer Holy Grail Indicator (Lifetime Premium)
324 in stock
Original price was: $1,861.99.$187.99Current price is: $187.99.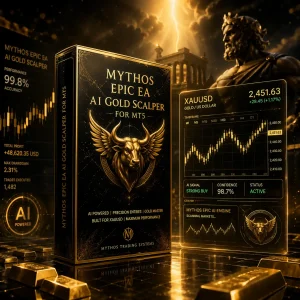
Mythos Epic XAUUSD EA: AI Gold Scalper for MT5
In stock
$0.00 $849.99Price range: $0.00 through $849.99
Nexora Manus XAUUSD EA: AI Gold Scalper for MT5
In stock
$0.00 $699.99Price range: $0.00 through $699.99

Obsidian Aether EURUSD EA: AI Grid Scalper for MT5
47 in stock
$0.00 $797.99Price range: $0.00 through $797.99
Onix Stratos XAUUSD EA: AI Smart Scalper for MT5
In stock
$349.00 $999.00Price range: $349.00 through $999.00
Powerful Forex VPS for MT4 & MT5 – Best Price
182 in stock
$44.99 $359.99Price range: $44.99 through $359.99

Top 2000 Trading Tools for Forex Success (EA & Indicator)
In stock
Original price was: $99.99.$0.00Current price is: $0.00. Gold Forex EA