Auto Supply and Demand Indicator MT4/MT5 FREE Download: Powerful Guide to Smarter Trading


The Auto Supply and Demand Indicator MT4/MT5 FREE Download has become one of the most searched tools among Forex traders. Why? Because supply and demand zones often reveal where major institutions enter the market. And if you can spot those zones automatically, you gain a serious edge.
Let’s break it down in simple terms and explore how this powerful tool can improve your trading results.
Introduction to Supply and Demand Trading
Supply and demand trading is built on one simple principle: price moves because of imbalance. When there are more buyers than sellers, price rises. When there are more sellers than buyers, price falls. Sounds basic, right? But the magic happens when we identify where those imbalances occur.
What Are Supply Zones?
Supply zones are price areas where strong selling happened before. These are often places where banks and large institutions sold heavily, pushing the price down.
When price returns to that area, it may drop again. Why? Because sellers might still be waiting there.
What Are Demand Zones?
Demand zones are the opposite. These are areas where strong buying previously occurred. Price reacted upward from that level because buyers stepped in aggressively.
When price revisits that zone, it may rise again due to renewed buying pressure.

Understanding these zones manually takes time and experience. That’s where automation comes in.
How the Auto Indicator Works
An auto supply and demand indicator scans historical price data and automatically marks strong zones on your chart. Instead of drawing lines manually, the software detects:
- Swing highs and swing lows
- Strong impulsive moves
- Consolidation areas before breakouts
- Price imbalances
The algorithm looks for areas where price left quickly with momentum. These rapid movements often signal institutional activity.
Zone Detection Mechanics
The indicator identifies:
- Base structures (sideways movement)
- Strong departure candles
- Sharp directional moves
When these patterns align, the system marks a supply or demand zone.
Fresh vs Tested Zones
Fresh zones are areas price hasn’t revisited. These are often stronger.
Tested zones have already been touched. Each retest weakens them slightly.
Smart traders prioritize fresh zones for higher probability setups.
Benefits of Using an Auto Supply and Demand Indicator
Here’s why traders love automation:
- Time-saving – No manual drawing required
- Objective analysis – Removes emotional bias
- Consistency – Same rules applied every time
- Better decision-making – Clear visual zones
- Beginner-friendly – Easy learning curve
In fast-moving markets like the Forex market, quick decisions matter. Automation helps you react faster.
Features of MT4 and MT5 Compatibility
Most traders use either MetaTrader 4 or MetaTrader 5. A good indicator must work smoothly on both.
MetaTrader 4 Overview
MetaTrader 4 (MT4) is popular because:
- It’s lightweight and fast
- Huge community support
- Thousands of free indicators
- Easy-to-use interface
MetaTrader 5 Overview
MetaTrader 5 (MT5) offers:

- More timeframes
- More order types
- Economic calendar integration
- Faster backtesting
An optimized supply and demand indicator should run efficiently on both platforms without slowing performance.
Installation Guide
Installing the indicator is simple:
- Download the .ex4 or .ex5 file
- Open MT4/MT5
- Click File → Open Data Folder
- Go to MQL4/MQL5 → Indicators
- Paste the file
- Restart platform
- Drag indicator onto chart
Always download from reputable sources like the official MQL marketplace at MQL5.com.
Best Settings for Maximum Accuracy
While default settings work well, you can optimize:
- Adjust lookback period
- Modify zone strength filter
- Set alert notifications
- Enable multi-timeframe analysis
Many traders use higher timeframes (H4 or Daily) for stronger zones and lower timeframes for entries.
Risk Management with Supply and Demand
Even the best zones can fail. That’s why risk management is crucial.
- Place stop loss slightly beyond zone boundary
- Risk only 1–2% per trade
- Use proper risk-reward ratio (minimum 1:2)
Remember: No indicator guarantees 100% accuracy. Discipline matters more than tools.
Common Mistakes Traders Make
Here are frequent errors:
- Trading every zone blindly
- Ignoring trend direction
- Overleveraging
- Using too many indicators
- Trading low-quality zones
Keep it simple. Combine structure, trend, and confirmation.
Combining with Other Indicators
For better accuracy, combine supply and demand with:
- RSI (for overbought/oversold confirmation)
- Moving averages (trend direction)
- Break of structure analysis
- Volume indicators
Some traders also compare zone levels with charting platforms like TradingView for cross-verification.
Is FREE Always Better?
Free indicators are great for beginners. However, some paid versions offer:
- Advanced filtering
- Automatic zone deletion
- Alert systems
- Better customization
But honestly? A solid free version can perform extremely well if used correctly.

Auto Supply and Demand Indicator MT4/MT5 FREE Download – What to Look For
When searching for Auto Supply and Demand Indicator MT4/MT5 FREE Download, check for:
- Positive user reviews
- No repainting behavior
- Clear visual zones
- Adjustable settings
- Alert notifications
- Regular updates
Avoid indicators that promise “100% win rate.” That’s unrealistic.
Frequently Asked Questions
1. Is the Auto Supply and Demand Indicator beginner-friendly?
Yes. Most versions are easy to install and visually clear.
2. Does the indicator repaint?
Some poorly coded ones do. Always test on demo first.
3. Can it be used for scalping?
Yes, especially on lower timeframes like M15 or M5.
4. Is it suitable for stocks and crypto?
Absolutely. Supply and demand works in all markets.
5. What timeframe works best?
Higher timeframes (H4, Daily) usually provide stronger zones.
6. Do I still need price action knowledge?
Yes. The indicator helps, but understanding structure improves accuracy.
Conclusion
The Auto Supply and Demand Indicator MT4/MT5 FREE Download is a powerful addition to any trader’s toolkit. It simplifies zone detection, saves time, and removes emotional bias from your analysis.
However, tools alone don’t create success. Combine the indicator with proper risk management, trend analysis, and disciplined execution.
If used correctly, this simple yet powerful system can help you trade smarter—not harder.
Most Popular Forex EA
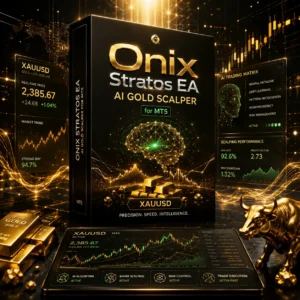
Onix Stratos XAUUSD EA: AI Smart Scalper for MT5
In stock
$0.00 $999.99Price range: $0.00 through $999.99
Elysium Vortex EURCAD EA: AI EURCAD Scalper for MT5
In stock
$0.00 $199.99Price range: $0.00 through $199.99
Equinox Cosmos GBPJPY EA: AI GBPJPY Scalper for MT5
In stock
$0.00 $399.99Price range: $0.00 through $399.99
Apex Quant BTCUSD EA: AI Bitcoin Scalper for MT5
In stock
$0.00 $159.99Price range: $0.00 through $159.99
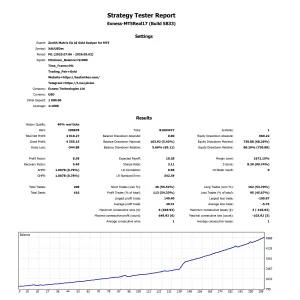
Zenith Matrix XAUUSD EA: AI Gold Scalper for MT5
In stock
$0.00 $899.99Price range: $0.00 through $899.99
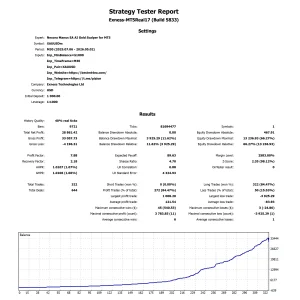
Nexora Manus XAUUSD EA: AI Gold Scalper for MT5
In stock
$0.00 $699.99Price range: $0.00 through $699.99
Mythos Epic XAUUSD EA: AI Gold Scalper for MT5
In stock
$0.00 $849.99Price range: $0.00 through $849.99

Obsidian Aether EURUSD EA: AI Grid Scalper for MT5
In stock
$0.00 $797.99Price range: $0.00 through $797.99

AVA AIGPT5 XAUUSD EA: AI Gold Scalper for MT4
In stock
$0.00 $679.99Price range: $0.00 through $679.99


Golden Deer Holy Grail Indicator (Lifetime Premium)
In stock
Original price was: $109.99.$87.99Current price is: $87.99.
Powerful Forex VPS for MT4 & MT5 – Best Price
In stock
$44.99 $359.99Price range: $44.99 through $359.99


 Gold Forex EA