How to Set Alerts in TradingView Step by Step (Complete Beginner’s Guide)


If you trade or invest and don’t want to stare at charts all day, alerts are your best friend. Learning how to set alerts in tradingview step by step helps you track price, indicators, and key levels automatically, so you only act when it really matters.
TradingView makes alerts simple once you understand the workflow. In this guide, you’ll learn exactly how to set price alerts, indicator alerts, and drawing alerts, as well as how to manage and customize them like a pro.
Understanding TradingView Alerts and Why They Matter
What Are Alerts in TradingView?
Alerts in TradingView are automated notifications that trigger when a certain condition is met. Instead of checking the chart every few minutes, you tell TradingView:
- “Notify me when price breaks above this level.”
- “Alert me when RSI crosses 70.”
- “Let me know when price touches my trendline.”
When that condition happens, TradingView sends you a message through your chosen channel (app, email, popup, etc.).
In short, alerts help you:
- Save time
- Reduce stress
- React faster to important market moves
Types of TradingView Alerts (Price, Indicator, Drawing, and More)
On TradingView, you can set alerts for several things:
- Price Alerts – Trigger when price reaches a fixed level (for example, BTC hits $60,000).
- Indicator Alerts – Trigger when an indicator crosses a level or signal (for example, MACD line crosses the signal line).
- Drawing Alerts – Trigger when price touches a line you’ve drawn, like a support, resistance, or trendline.
- Strategy Alerts (Advanced) – Trigger based on custom Pine Script strategies and webhooks.
Each type fits a slightly different trading style, but they all follow similar steps.
Benefits of Using Alerts in Your Trading Strategy
Using alerts the right way gives you several advantages:
- You don’t chase price – The market comes to your level, not the other way around.
- You stay disciplined – You pre-plan your important areas and let alerts do the watching.
- You gain flexibility – You can step away from the screen and still catch moves.
- You reduce emotional trading – Alerts are based on your logic, not on fear or FOMO.
Before You Start: Setting Up Your TradingView Account
Creating a Free or Paid TradingView Account
To use alerts, you first need a TradingView account. The platform offers:
- Free plan – Limited number of active alerts, good for beginners.
- Paid plans (Pro, Pro+, Premium) – More alerts, more features, and more simultaneous conditions.
You can create an account on the official TradingView site (just search “TradingView” in your browser or visit their main page). It’s quick and works with email or social logins.
Choosing a Plan Based on Your Alert Needs
If you’re just starting:
- The Free plan is usually enough to test how alerts work.
- If you need many alerts across multiple assets, a Pro or higher plan may be better.
TradingView clearly lists how many active alerts each plan allows. You can check their pricing and limits on their official pricing page for up-to-date details.
Basic Platform Overview (Charts, Watchlists, Tools)
Before you learn how to set alerts in tradingview step by step, it helps to know where things are:
- Watchlist – On the side, to pick symbols like BTCUSD, AAPL, EURUSD.
- Chart area – The main window where you see candles and indicators.
- Toolbar and drawing tools – On the left and top, for lines, indicators, and settings.
- Alert button – Often shown as an alarm clock icon near the top bar or in right-click menus.
Once you know these areas, setting alerts becomes much easier.
How to Set Alerts in TradingView Step by Step on Price Levels
This is the core of how to set alerts in tradingview step by step. Let’s walk through a simple example: creating a price alert when Bitcoin reaches a certain level.
Step 1: Open the Chart of Your Desired Asset
- Go to the search bar at the top.
- Type the symbol (for example:
BTCUSDT,AAPL,EURUSD). - Click the asset to open its full chart.
Make sure you’re on the correct market (for example, the right exchange or broker feed).
Step 2: Identify the Price Level You Want to Track
Next, decide what price is important to you:
- A resistance level above price where you might sell or short.
- A support level below price where you might buy.
- A breakout level where price might run strongly.
You can hover your mouse on the price scale or chart to see the exact value.
Step 3: Right-Click to Add a Simple Price Alert
Now:
- Move your mouse to the exact price on the chart or in the price scale.
- Right-click at that level.
- Choose “Add Alert” from the menu.
TradingView will open the Create Alert window.
You can also click the alarm clock icon at the top and set the condition from there.
Step 4: Configure Alert Conditions, Options, and Expiry
In the Create Alert window, you’ll see several options:

- Condition – Usually “Symbol Crossing Value” or “Last Price Crossing”.
- Value – The price level you chose (you can adjust it manually).
- Options – How often it triggers:
- Once – Alert deletes itself after triggering once.
- Once per bar – It can trigger once during each candlestick.
- Once per bar close – Triggers only after the candle closes.
- Expiration time – Date and time the alert stops working if not triggered.
- Alert name and message – You can write a custom note like “BTC break above key resistance.”
You can also pick notification channels, such as:
- Show popup
- Send email
- Send app notification
(We’ll cover these in more detail later.)
Step 5: Test and Save Your Alert
Finally:
- Double-check the price level and condition.
- Make sure the direction is correct (crossing up vs crossing down).
- Click “Create” or “Save”.
Your alert is now active. You’ll usually see a small icon or line on the chart showing where the alert sits.
Creating Indicator-Based Alerts in TradingView
Price alerts are great, but indicators can give smarter signals.
Using Built-In Indicators Like RSI, MACD, and Moving Averages
To set alerts on indicators:
- Click “Indicators” at the top of the chart.
- Search for built-ins like:
- RSI (Relative Strength Index)
- MACD
- Moving Average or EMA
- Click the indicator to add it to your chart.
You’ll see it appear either in a separate pane (like RSI/MACD) or overlayed on price (like Moving Average).
Step-by-Step: Setting an Alert on an Indicator Signal
Here’s a simple example using RSI:
- Add RSI to your chart.
- On the RSI pane, right-click on the indicator line or click the three dots (…).
- Select “Add Alert on RSI” (wording may vary slightly).
- In the Condition dropdown, pick something like:
- “RSI Crossing 70” (overbought)
- “RSI Crossing 30” (oversold)
- Set options:
- Alert frequency (once, once per bar, once per bar close).
- Expiration time.
- Notification methods and custom message.
- Click Create.
This same logic works for MACD crossovers, moving average crossovers, and more.
Common Use Cases for Indicator Alerts
You might use indicator alerts to:
- Catch overbought or oversold levels (RSI).
- Spot trend reversals or momentum shifts (MACD).
- Detect moving average crossovers (Golden Cross, Death Cross).
- Track volatility breaks (Bollinger Bands, ATR-based tools).
Indicator alerts help you act only when your chosen conditions are met.
Setting Alerts on Trendlines and Drawings
Sometimes levels are not fixed prices but dynamic lines, like trendlines.
Drawing Support, Resistance, and Trendlines First
First, draw your area:
- Use the Trend Line tool from the left toolbar.
- Click to place the first point, then click again to place the second point.
- Adjust until your line matches the structure you want (support, resistance, channel, etc.).
Attaching Alerts to Lines and Zones
To set an alert on a drawing:
- Right-click the line or drawing.
- Choose “Add Alert on Trendline” or similar wording.
- In the alert settings, specify:
- When price crosses, touches, or breaks the line.
- Alert frequency and expiration.
- Save the alert.
The alert will now respect the line’s slope and move as the line moves.
When to Use Drawing-Based Alerts
Drawing alerts are useful when:
- You trade trendlines and channels.
- You look for breakouts from consolidation zones.
- You want signals when price retests a broken level.
Managing, Editing, and Deleting Alerts in TradingView
Once you have several alerts, you’ll want to manage them.
Using the Alerts Manager Panel
TradingView has an Alerts Panel, usually on the right side:
- It lists all active, paused, and expired alerts.
- You can see status, conditions, and last trigger time.
This panel is the control center for your alert system.
How to Pause, Modify, or Duplicate Alerts
From the Alerts Panel, you can:
- Pause an alert if you don’t want it to trigger temporarily.
- Edit an alert to change its level, message, or notification style.
- Duplicate an alert to quickly create similar ones with small differences.
Editing is handy if you slightly adjust your support/resistance or indicator thresholds.
Cleaning Up Old or Expired Alerts
It’s good practice to:
- Delete old or irrelevant alerts regularly.
- Keep your panel clean so you don’t get confused.
- Review triggered alerts to learn how price behaved around your levels.
Customizing Alert Notifications (Email, App, Pop-Up, Webhook)
Choosing Notification Channels That Suit Your Lifestyle
TradingView supports several channels:
- On-screen pop-ups – Great when you’re at your computer.
- Email alerts – Useful if you check your inbox often.
- Push notifications on mobile app – Perfect for when you’re out.
- Webhooks – For advanced users who connect alerts to bots or external tools.
You can pick one or multiple channels for each alert.
Enabling Notifications on Desktop and Mobile
To make sure you receive alerts:
- On desktop, allow browser notifications if needed.
- Download the TradingView app on your phone or tablet.
- Log in with the same account on all devices.
- In your TradingView profile settings, check that notifications are enabled for the channels you want.
Using Webhooks for Bots and Automated Systems
For more advanced setups, you can:
- Use the Webhook URL field in the alert settings.
- Connect TradingView alerts to a bot, server, or third-party service.
This is often used in algorithmic trading setups, but beginners can safely ignore it until they’re comfortable.
Best Practices to Use Alerts Like a Pro Trader
Avoiding Over-Alerting and Notification Fatigue
If you set too many alerts:
- Your phone will buzz nonstop.
- You’ll start ignoring messages.
- Important alerts might get lost in the noise.
Try to:
- Focus on key levels only.
- Use higher timeframes for major alerts.
- Group assets and priorities logically.
Combining Alerts with Risk Management Rules
Alerts are tools, not magic signals. Combine them with:
- Clear entry and exit rules.
- Defined stop losses and position sizing.
- A back-tested plan, not random guesses.
An alert should say, “Now check the chart,” not “Buy blindly.”
Timeframe and Asset Selection Tips
- For day trading, use alerts on intraday timeframes like 5m, 15m, or 1h.
- For swing trading, use 4h, daily, or weekly levels.
- Avoid setting alerts on every minor wiggle in price.
Common Mistakes When Learning how to set alerts in tradingview step by step
Setting Alerts Too Close to Current Price
If your alert is just a few ticks away:
- It might trigger constantly during normal noise.
- You’ll get frustrated and start ignoring alerts.
Instead, place alerts at meaningful levels, such as strong support, resistance, or key indicator signals.
Forgetting to Check Timeframes and Sessions
Sometimes an alert doesn’t make sense because:
- You set it while viewing one timeframe but trade on another.
- The market is closed or illiquid.
Always check:
- The timeframe you used to define the level.
- Whether the asset trades 24/7 or has set market hours.
Relying Only on Alerts Without Analysis
Alerts are not a replacement for learning:
- They’re reminders, not decisions.
- You should still analyze structure, volume, and context.
Use alerts to support your strategy, not to replace it.
FAQs About TradingView Alerts
FAQ 1: How many alerts can I set on a free plan?
The free plan allows only a limited number of active alerts at the same time. The exact count can change, so it’s best to check the official TradingView pricing and feature comparison page for the latest number. If you need more, consider upgrading to a paid plan.
FAQ 2: Can I set alerts that repeat automatically?
Yes. When creating an alert, you can choose options like “Once per bar” or “Once per bar close”, which allow alerts to trigger again when conditions are met in new candles. This is helpful for indicators like RSI or MACD, where signals can repeat.
FAQ 3: Do TradingView alerts work when my computer is off?
Yes. TradingView processes alerts on its servers, not on your personal device. As long as your alert is active and you’re logged into the same account, it can send notifications even if your computer is off. Just make sure email or mobile notifications are enabled.
FAQ 4: Can I get alerts on my phone?
Absolutely. Install the TradingView mobile app, log in with your account, and allow notifications. Then, when you create or edit alerts, select “Notify on app”. You’ll receive push notifications on your phone whenever the alert triggers.
FAQ 5: Can I set alerts for custom indicator strategies?
Yes, if the indicator or strategy is built with alert conditions in Pine Script. Many public and paid scripts support alerts. When they do, you’ll see them available under the Condition dropdown when creating an alert. For advanced users, you can learn Pine Script and create your own alert-ready strategies.
FAQ 6: Why didn’t my alert trigger even though price touched the level?
Possible reasons include:
- The alert was set to trigger only on bar close, but price reversed before closing.
- Your alert used bid, ask, or another price source instead of last.
- The alert was paused, expired, or deleted.
Check the alert’s condition settings and logs. Adjust the condition (for example, from “once per bar close” to “once per bar”) if needed.
Conclusion: Master how to set alerts in tradingview step by step and Trade Smarter
By now, you’ve seen how to set alerts in tradingview step by step for price levels, indicators, and drawings. You’ve also learned how to manage alerts, customize notifications, and avoid common mistakes.
Alerts can’t guarantee profits, but they can:
- Keep you organized
- Help you stick to your plan
- Let you live your life without staring at charts all day
If you’d like more official details, examples, and platform updates, you can explore TradingView’s own Help Center and documentation, which offers tutorials and explanations on alert features.
Use alerts wisely, stay disciplined, and you’ll turn TradingView into a powerful assistant that supports your trading journey.


Most Popular Forex EA

Apex Quant BTCUSD EA: AI Bitcoin Scalper for MT5
In stock
$0.00 $159.99Price range: $0.00 through $159.99

AVA AIGPT5 XAUUSD EA: AI Gold Scalper for MT4
In stock
$0.00 $679.99Price range: $0.00 through $679.99
Elysium Vortex EURCAD EA: AI EURCAD Scalper for MT5
In stock
$0.00 $199.99Price range: $0.00 through $199.99
Equinox Cosmos GBPJPY EA: AI GBPJPY Scalper for MT5
In stock
$0.00 $199.99Price range: $0.00 through $199.99


Golden Deer Holy Grail Indicator (Lifetime Premium)
324 in stock
Original price was: $1,861.99.$187.99Current price is: $187.99.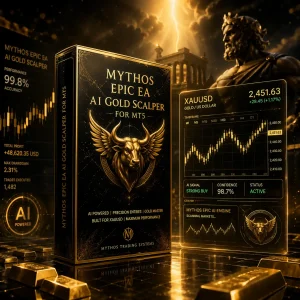
Mythos Epic XAUUSD EA: AI Gold Scalper for MT5
In stock
$0.00 $849.99Price range: $0.00 through $849.99
Nexora Manus XAUUSD EA: AI Gold Scalper for MT5
In stock
$0.00 $699.99Price range: $0.00 through $699.99

Obsidian Aether EURUSD EA: AI Grid Scalper for MT5
47 in stock
$0.00 $797.99Price range: $0.00 through $797.99
Onix Stratos XAUUSD EA: AI Smart Scalper for MT5
In stock
$4.99 $999.99Price range: $4.99 through $999.99
Powerful Forex VPS for MT4 & MT5 – Best Price
182 in stock
$44.99 $359.99Price range: $44.99 through $359.99

Top 2000 Trading Tools for Forex Success (EA & Indicator)
In stock
Original price was: $99.99.$0.00Current price is: $0.00. Gold Forex EA